

This design is especially great because we have the fun magnets but we can also use the dry-erase function of the board which is great when there are small home repair projects to do that won't be repeated often.
Materials:
- 2 dry-erase magnet boards (came with markers)
- ribbon
- E-6000 glue
- magnet tops (can be anything)
- sticker letters
- magnets
- something to space out the two boards evenly when glueing (we used a deck of UNO cards)
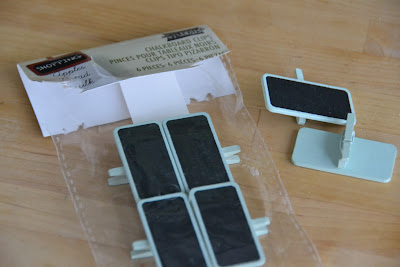
Step 1: Remove anything from the back of your magnet top. In our case we removed the little clothes pins. We found these at Michaels, a pack of 6 for $1.
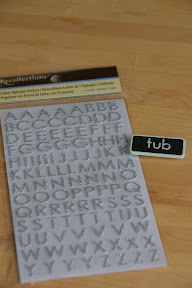
Step 2: Decide on the words and keep them small! Use the sticker letters (glitter makes for a good look) to create the finished magnet top.
Step 3: Glue the magnets to the back. We learned the hard way that if you buy good magnets, not to take them out of the package at the same time and not to place still-drying magnets near each other... they move and attach to each other!

Step 4: Cut two pieces of ribbon the length you want to join the 2 boards. Cut a third ribbon to hang the finished chore chart from. It doesn't need to be as long as the one I used. We used a deck of UNO cards to keep the 2 boards equidistant so that the lower board would hang evenly from the top one.

Step 5: Hang the chore chart using a 3M removable Command Hook.

Do you find a chore chart or list helps you complete them with minimal fuss? Does it stop arguments from happening?
No comments:
Post a Comment